Reverb.com is a new very cool site for those interested in great guitar gear!
Reverb.com Three Buck Tuner is a NO BRAINER must have guitar accessory!
Reverb.com offers a clip on guitar tuner for three bucks including battery and shipping!!
What initially seemed like a difficult battery install also turned out to be a no brainer! Please read to the end for the “rest of the story”!!!
So Reverb.com offers a clip on guitar tuner for 3 bucks including battery and shipping. So how can they do this? And if so, how good can it really be. The answer to the first question I do not have but I have the answer to the second; excellent!!! A Reverb.com guitar tuner for three Bucks?!! A NO BRAINER!!! And you just might want one!! Here is the scoop.
I thought it simply HAD! to be a piece of junk.
When I first saw this offer I thought I was misreading it or it simply HAD! to be a piece of junk, However, I could not resist the hook and I have thrown away three dollars in hopes of winning the Lottery many times and have lost repeatedly, so why not take a chance? The worst that could happen is I wasted three bucks again in hopes of getting more than I bargained for.
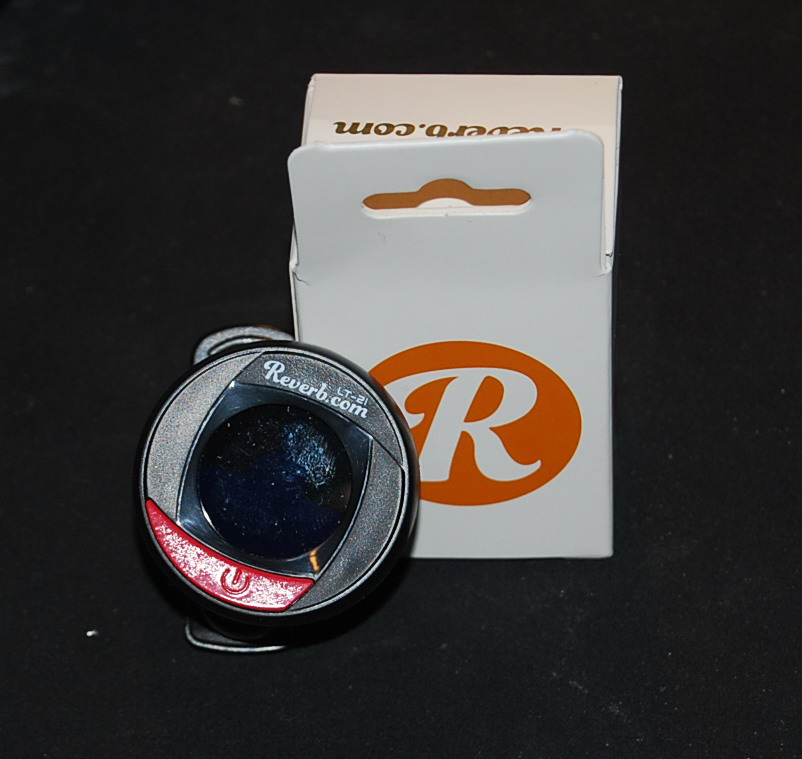
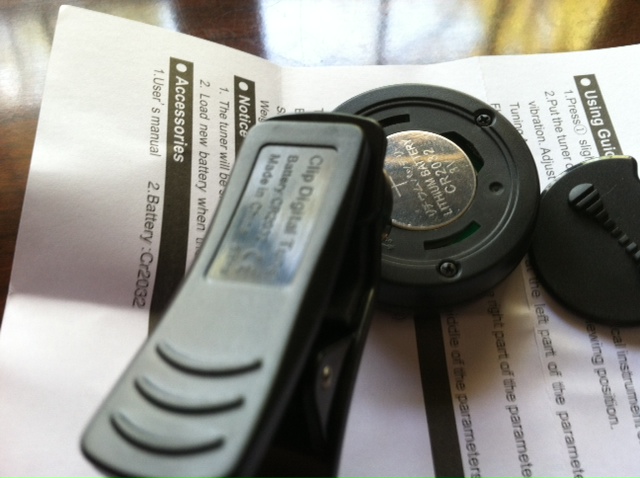
And so I made the purchase on line at Reverb.com. http://reverb.com/ which is a great new company IMHO for gear heads like myself and obviously you guys and gals currently tuned into this rant. Less than a week later it arrived. Upon opening the package I was surprised to see a nice clip on tuner with a firm rubber pads so as not to damage the instrument being tuned. Nice touch, especially in this ridiculously low price range. Also included was the operating instructions and the necessary battery. Would have been nice if the battery came installed as you will now see.
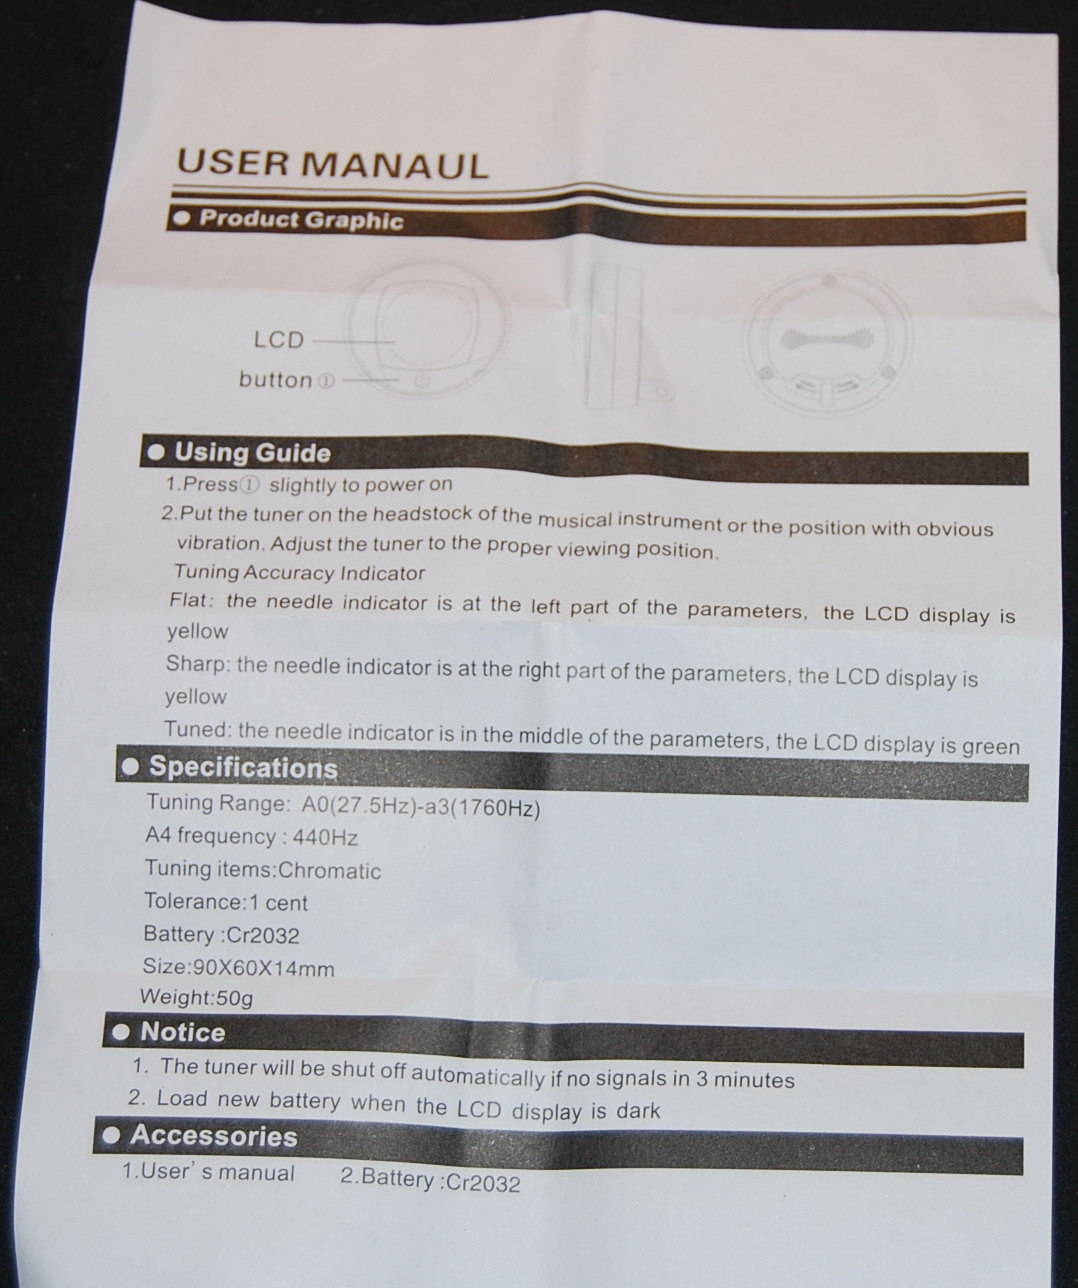
The enclosed instructions included no information on installing the included battery
Battery installation is maddeningly frustrating!
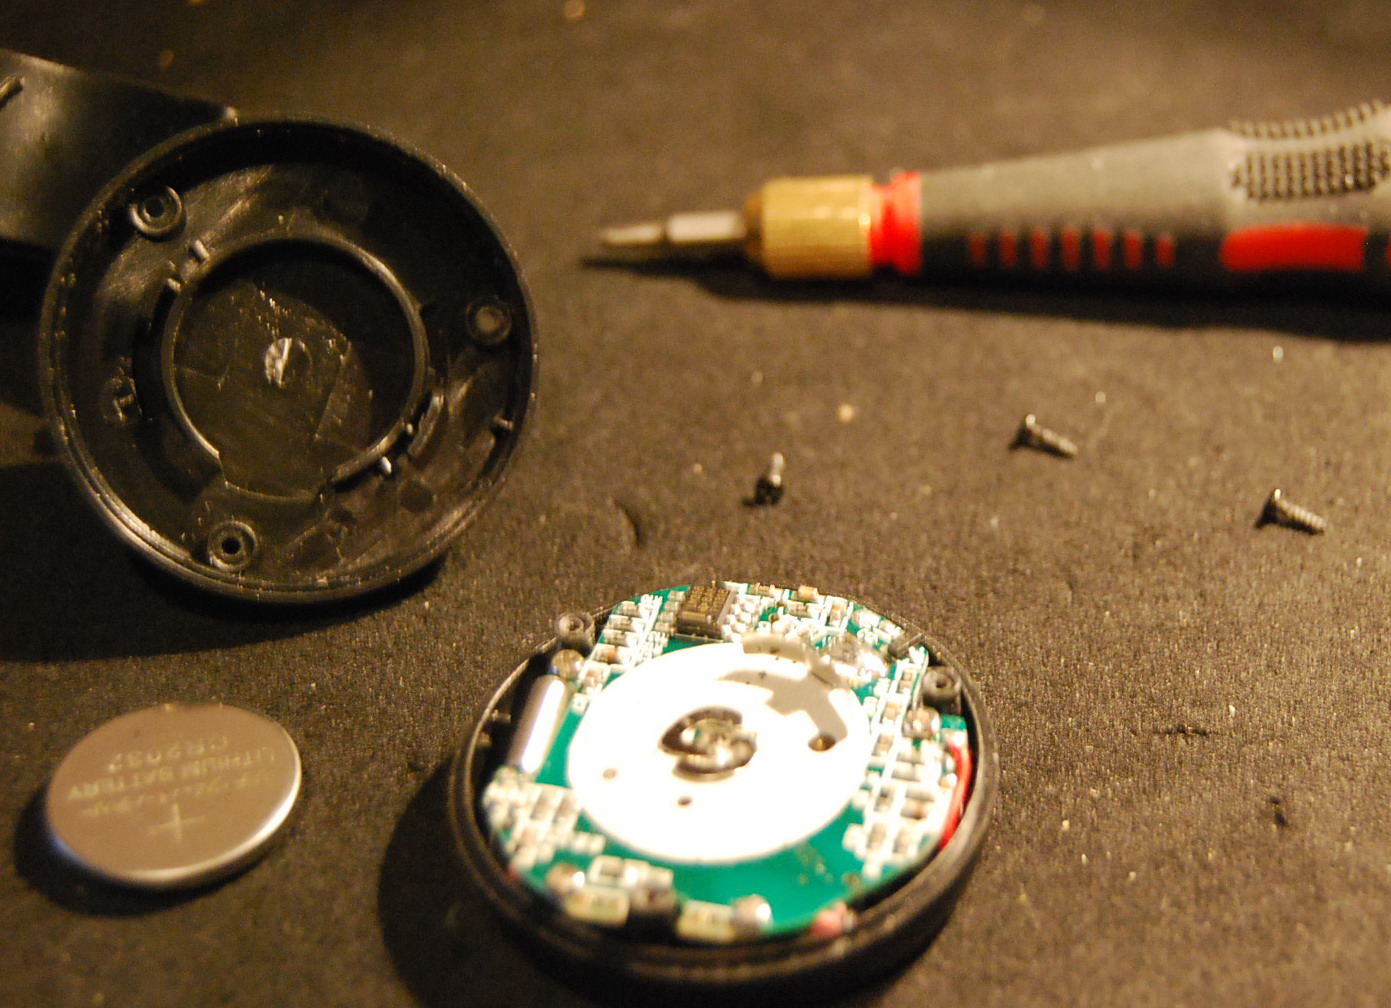
I got out my trusty Philips jewelry screwdriver, unscrewed and popped off the back.Where the battery went became obvious, the polarity orientation was not.
I read the enclosed instructions for the Reverb.com Three Buck Tuner which included no information on installing the included battery. As the back of the case had some raised knurled louvers I tried to slide the back off with my thumb. No such luck. I then tried to turn the cover counter clockwise by grabbing the knurled louvers. Try as I did, still no luck and I feared if i applied any more force, I might break the unit. Then I noticed three tiny screws placed in triangular formation. I got out my trusty Philips jewelry screwdriver, unscrewed and popped off the back. Where the battery went became obvious, the polarity orientation was not. I placed the battery in and nothing happened, turned it over and voila the unit came to life and lit up with a beautiful color display. I consider myself pretty handy at dealing with small stuff, but the battery installation was a bit dicey and quite maddening. As it turned out, you have to get the battery to lean against a raised curved spring bar and then slide the cover on so that it pushes the battery the rest of the way into position and then squeeze to close.
Starting to think that by the time I got it right, I might kill the battery.
This approach took several tries each time powering up the unit. I was starting to think that by the time I got it right, I might kill the battery. Finally or so I thought, I got the battery in and the back on only to find out that my screws were not aligned with the now hidden receptacles. The back comes off again and the battery loses its tenuous position, only to do this all over again this time making sure the screw holes are lined up. Would have been nice if there were markings on the outside of the case to indicate where the screw holes were, but again at this price………
Okay so one more time and it is done!!
“What a piece of junk!!” “good-buy three dollars” was now “good-bye three dollars”???!!
Once powered on (hold the on/off button until the unit powers up, do the same to power off) the unit shuts down by itself in three minutes. I clip the tuner to the headstock of my Epiphone ES339 Pro and I am getting totally erroneous readings. At this point, I am thinking; “What a piece of junk!!” and that my “good-buy three dollars” was now “good-bye three dollars???”!! After taking a pause to say “hmmmmm…”I decided that maybe rebooting this tuner might clear things up now that I knew how to install the battery without a dozen false attempts that might have “confused” its tiny brain. A snap off, install battery, snap on scenario for battery installation would have made a potentially great tuner also a totally legendary experience overall.
Back off the cover comes once again,….. GROANNNNNNnnnnnn.

Liquid Patience puts things into a new perspective!
Liquid Patience……….
I was a half hour into this by 7:30 P:M and was now sensing the need for an adult beverage to take the edge off the growing frustration. A nice cold Miller 64 http://www.miller64.com/ and a shot of vodka http://en.wikipedia.org/wiki/Barton_Brands did the trick by putting things into a new perspective! Liquid patience! I loosen the screws enough to spread the back off so that battery contact is lost and the tuner winks out. I wait about fifteen seconds and squeeze the case closed and with the tuner coming back to life, I once AGAIN!!! Tighten the screws.
Voila, the tuner locks on like a magnet!
Voila, the tuner locks on like a magnet to each string with its beautiful
color display.

This little Reverb.com
three buck tuner very calmly led me to perfect tuning on every string.
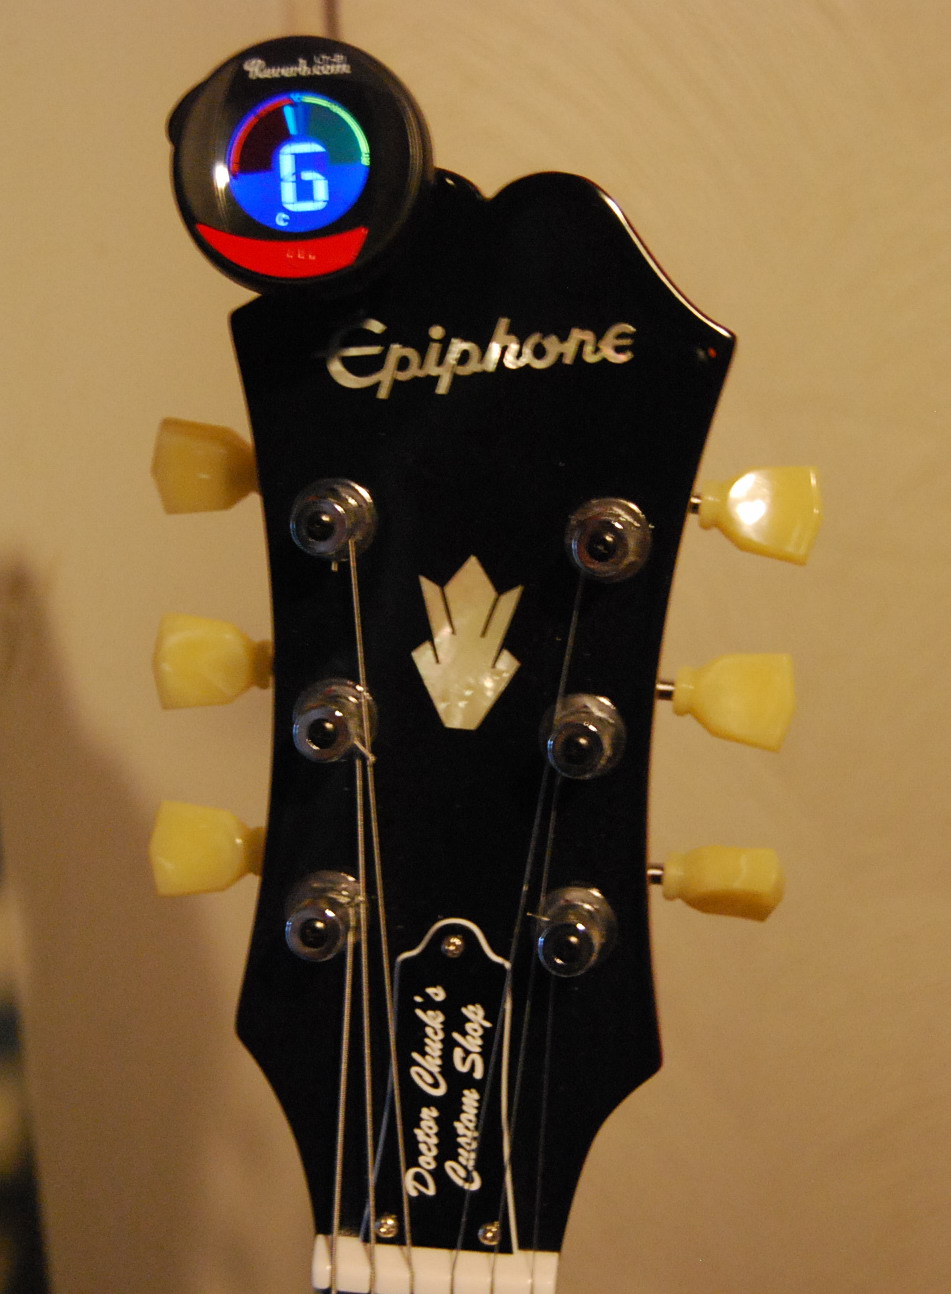
Another pull on the Miller 4 bottle and I attach the Reverb.com three buck guitar tuner yet again to the headstock of my Epiphone ES339. Voila, the tuner locks on like a magnet to each string with its beautiful color display. I guess that rebooting was the thing to do and I am glad I did not give up on it and put it to the curb! Unlike many tuners that maddeningly waver sharp of flat seemingly for no reason, this little Reverb.com three buck tuner A NO BRAINER!! very calmly led me to perfect tuning on every string. In short it works and looks great!!
Includes five modes: C, G, B, V, U (chromatic, guitar, bass, violin, ukulele) to cover the gamut of stringed instruments.
Further info on the display. At the bottom there is a series of letters: C,G,B,V,U that you can access in sequence by quick clicks of the on/off switch. I really could not figure out what purpose it had other than adding confusion to my guitar tuning experience, and there is nothing in the instructions alluding to their function. In any case, if you happen to notice that your tuner is acting whacky and telling you that you are on your “G” string when you are in fact on your “D” string, take a look at the little letter and if it is not the letter “C or G”, click your way to either and restore sanity back to the tuner and to your life. Frustrated I then go back to the original ad to see if I missed anything not included in the instructions. As it turns out I did!! Those little letters NOT explained in the owners manual are indeed explained in the original promotional ad copy which explains that the Reverb.com Three Buck Tuner; A NO BRAINER includes five modes; C,G,B,V,U (chromatic, guitar, bass, violin, ukulele) to cover the gamut of stringed instruments,… duh!!!……
Reverb.com Three Buck Guitar Tuner definitely worth the price of admission.
There is no reason for you NOT to get yourself one!
Now that I have explained how to install the battery, there is no reason for you NOT to get yourself one while the getting is good. At this price and level of performance which is as good as or better than other similar tuners at several times the price, I might guess that they will not last. No excuses! Great little tuner! Period! And now you know why you should get one. The Reverb.com Three Buck Tuner really is three buck Wonder and A NO BRAINER. Order one today!!
https://reverb.com/item/45234-reverb-clip-on-tuner
Just out of curiosity I did a Google search for “$3 guitar tuner” and it seems there is only one to be had!! The Reverb.com Three Buck Guitar Tuner. A NO BRAINER!!!
PROS: Excellent well built tuner with a bright clear color display and unwavering solid string tracking. Amazing, unheard of unbeatable price includes, battery and shipping!!! WOW!!!!!! A must have gear accessory!
CONS: No instructions for battery installation which is maddeningly frustrating until you figure it out and get the knack. Case could have had markings to let you know where the screw holes are which are hidden once you place the battery cover back on. A snap off, install battery, snap on scenario for battery installation would have made a great tuner also a totally legendary experience overall. Instructions should have included information on the tuning modes only explained in the Reverb.com promotional ad copy.
UPDATE!!!!!!!
Two of my buddies got back to me on their experiences with installing a battery on the Reverb.com Three buck tuner. A NO BRAINER!! Buddy number one experienced a bit of difficulty until his son, obviously with better vision pointed out the little symbols his Dad and I had missed….
<<So my tuner arrived the other day and I spent about an hour trying to get the battery in, which I was finally able to do, but not before dropping one of the (tiny) screws on the floor and not being able to find it until I swept the floor the next day. After I put the screw in, I explained to my son how ridiculously difficult it was to put the battery in. He looked at the tuner and said, all you have to do is screw off the back. OMG! Look at the back and, where the tuner mounts to the clip, on the left it says “OPEN” with an arrow pointing clockwise, and to the left it says “CLOSE” with a CCW arrow. It’s VERY difficult to see, but it’s there, and the back does indeed come off when you turn it CW. Check it out.
Buddy number two also pointed out the desired way to install the battery while also being so “kind” as to praise my blog and to suggest a topic for my next post. (Grooaaaannn…..)
I guess there were no battery loading instructions because it’s blatantly obvious how the compartment opens. So much for the value of your blog. I guess anyone with enough time on their hands to endure reading your blog can well afford to follow your instructions. Your next post should educate your readers (on) how to open their guitar cases by removing the hinges!… >>
Reverb.com Three Buck Tuner. A NO BRAINER! Back cover unscrewed off.
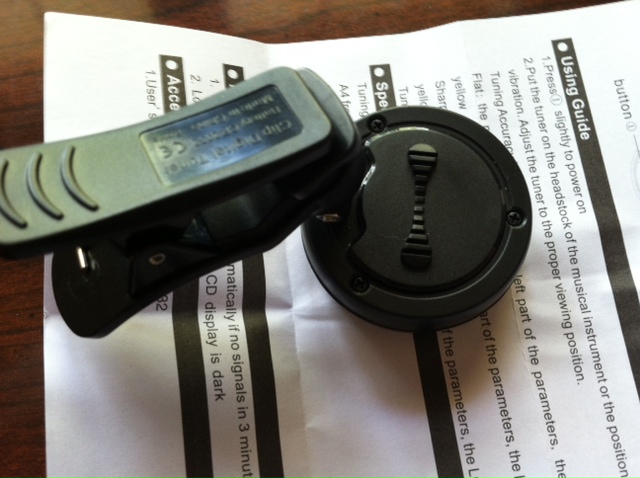
Reverb.com Three buck tuner. A no brainer!!! Back cover replaced.
Liquid Patience puts things into a new perspective!
So as can be seen, I get by with a little help from my friends…….In any case, despite failing at first to notice the tiny “open” and “close” designations, I did indeed at first try the intuitive method of unscrewing the knurled back to open it up. Would not budge with what I thought was a very ample amount of force, and for that matter still will not as I tried again with most ample force. I suspect buddy number two’s Reverb.com Three Buck Tuner unscrewed quite a bit easier otherwise he might have unscrewed it like buddy I and buddy number one did. For three dollars I may throw caution to the wind and try once more, maybe with a channel lock pliers and see what happens. Hahaha!!… Hmm… maybe not…………. In any case, despite the inadequate instructions, this Reverb.com 3 Buck tuner is a great deal and a NO BRAINER! Get one while the getting is good!!
The Plot Thickens……..That the back of this tuner was counter conventional never occurred to me, duh!
Good thing I did not take myself seriously with that there channel lock pliers and forcefully try to unscrew this darn thing. Sometimes childish ignorance is bliss and an advantage. Turn one way, then turn the other until it opens is a naïve but obviously very effective approach. From countless hours tinkering with nuts and bolts and anything that requires using screw drivers I am programmed towards convention almost to a fault ( righty tighty, lefty loosey) That the back of this tuner was counter conventional never occurred to me where as a child, with no preconceived notions might find the solution in a child like manner that I failed to see. The few things that I have encountered with reverse threading also had instructions that pointed this out. I never expected this in a guitar tuner as there is no advantage in doing this. So in the end I love the tuner but the owner’s manual leaves a bit to be desired. No instructions on battery installation and tuning modes and the fine print on the tuner itself was extra fine. The main thing is that this Reverb.com Three Buck Tuner is a great tuner at a great price. No regrets!
So simple….“Why didn’t I think of that?!!”
Once in a while something really simple in concept come along that is executed so excellently that it beckons the question; “Why didn’t I think of that?!!” The Jekeko Wah fixed variable wah is one of those simple but great devices.

Jekeko Wah Fixed Variable Wah Pedal. Find and “park” your tone!
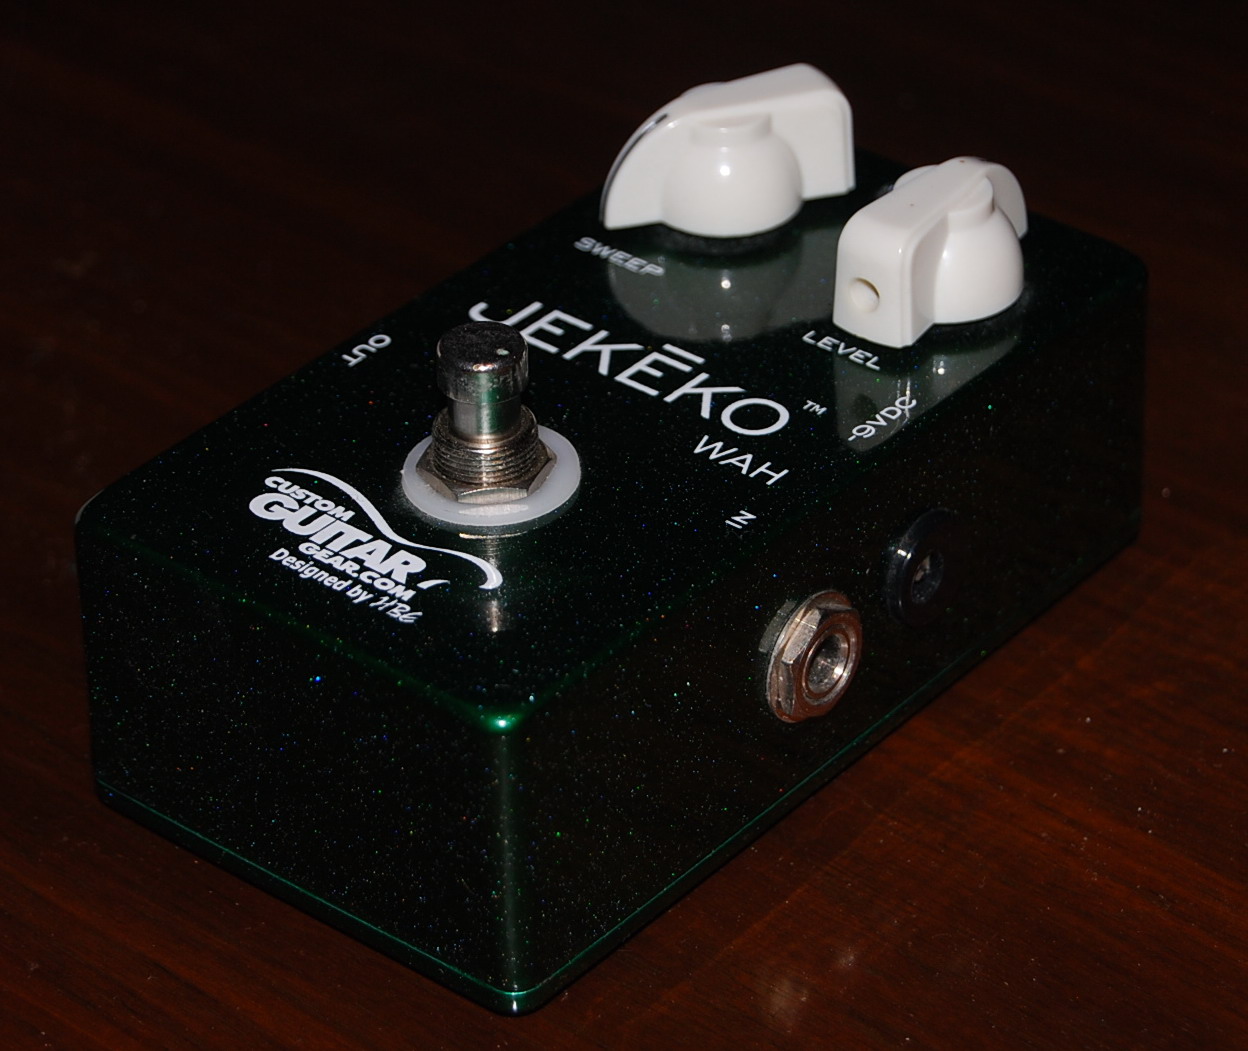
Jekeko Wah Fixed Varible Wah Pedal. Photos cannot capture the beautiful Sparkling Emerald Green.
All of us have played through wah pedals at one time or another and appreciate the sound of the physical movement of the pedal as an extension of our emotions as translated into guitar leads. Yes, the original wah concept was an enormous addition to what at the time was a quite Spartan array of available effects; i.e. reverb, tremolo, ( the very cool pitch changing vibrato unique to Magnatone amps ), and the fledgling fuzz. This was a game changer. Between the extremes of the available range on the wah pedal there also was a plethora of available tones to be experimented with and enjoyed in between. And so not only did we want to simply to wah/wah away ad infinitum, we wanted to get tones that were otherwise unavailable and we did so by being able to simply find a good setting, leave the pedal there because with the Jekeko Wah you can “Park” your tone!
Capture the famous Vox Super Beatle Amp MRB magic and get John Lennon’s hollow “I Feel Fine: lead tone.
My original wah pedal was a Vox and I loved it. Funny how when I was a kid and had to save up for my toys that I was never reluctant to loan them out. Yep I really loved that Vox wah until it was never returned to me. That hurt!! Anyway, one of my favorite things that I used to like to do with this pedal was to simulate the mid range boost or “MRB” magic of the famous Vox Super Beatle Amp and get John Lennon’s hollow tone as used for the intro lead on “I Feel Fine”. This tone was also used elsewhere by The Beatles and to me it was ultra cool. So I would engage the wah and slowly treadle the pedal until I hit what I thought was the best approximation of the sound, “park” the pedal and play away. It really did sound great!
“Park” your tone!
Okay so now you get the premise about “parking” your tone. The problem is that this is kind of awkward to do in the middle of a song to say the least. Wouldn’t it be nice if there was a pedal that you could simple dial in whatever tone in the wah spectrum you were looking for, park your tone, and then have it set and ready to go all with the push of a foot switch? Enter the Jekeko Wah! http://www.customguitargear.com/customguitargear-jekeko-wah-manual-fixed-adjustable-wah-pedal/This pedal is exactly what I was looking for and I assume what you boys and girls also might be looking for as well. This pedal allows you to park your wah tone anywhere and also boost it as well. So simple but so effective. There are also internal adjustments allowable to further tweak and personalize this pedal but even as is, I love it. An LED to let you know when the pedal is engaged is also a nice touch, and for the purists the foot switchable circuit is a true bypass design.
Jekeko Wah. Fixed Variable Wah. expensive but worth it.
A metal bud box style cabinet finished in sparkled deep emerald green that offsets the white chicken head knobs, no photo seems to do this pedal justice. In any case it will take up relatively little space on your pedal board and is one those superior pedals that at $189.00 plus shipping fall into the category of expensive but worth it and because you drink Miller 64 instead of expensive Heinekens you know you won’t feel guilty for wanting it. So go ahead, add one of these great Jekeko Wah Fixed Variable Wah pedals to your arsenal find that great sound and “Park” your tone!
For further study:
As I told you boys and girls this website drchucksgearrants would include many available things that might be labeled topicality.
Food and drink are not quite up there with “all things guitar and gear” but really do indeed qualify as they are part or the overall recipe. And speaking of recipes I have a great easy one for chicken on the grill indeed!! So as we celebrate this holiday season let us behold good food, good, drink, and a Fender Strat. Merry Christmas!!! My choice weapon for the evening is my 1990 Fender Stratocaster Plus which I purchased new and is in clean, mint condition. You could eat your dinner off this guitar it is so clean, but of course the barbequed chicken would probably slide off on to the floor so I don’t think it might be a good idea. I also hope you like my Christmas tree. As one of my guests said;… “Nice! Hey man, you go all out!!!”..hahahahaha!!!!

Chicken, spirits and a Fender Stratocaster make for great dinner company!
Tonight is about guitars, spirits, and beautifully marinated chicken roasted to perfection on the grill.
I know you might consider the close ups of my chicken breasts either most beautiful or quite disgusting. I would like to set the moment straight in that as I totally appreciate PETA and the Vegans. However tonight,….. this is about uhh,… guitars, spirits, and beautifully marinated chicken roasted to perfection on the grill despite that it is below freezing outside. As they say at the beginning of many programs; “Possible Disturbing Content. Parental Advisement Advised”. And so this is the disclaimer; “If you don’t like recipes for cooked animal flesh, move on at this “pernt”. If not; BEHOLD my very simply and effective knock out approach to barbeque roasted chicken that will knock you and your guests off their collective heels!!!

Split Chicken Breast Marinated to perfection and ready to be grilled
Anything can be parted out now a days; guitars, cars, and chickens……
This can be done with any type of animal flesh AKA meat, but it works especially well with chicken. Any chicken part will do but I prefer split breasts and thighs as my favorites. Can you imagine that the Industrial SCAVENGERS not only part out guitars, (??!!! ) they also part out CHICKENS!??!!! YESS!!!! Breasts, thighs, wings, legs, backs, Fender Stratocasters, and hopefully not quite so soon, you and me to make SOYLENT GREEN!!! Yipes!!!!!
Question this? Yes they do!! In fact ANYthing that can be parted out for a profit can and will be done, and you guys might have thought this concept was only limited to motor vehicle Chop Shops, yeah??!! Well, it even gets worse. I f you are in a “T”Turd World or a “T”urd and a Third World country, your body parts might be parted out as well, and against you will, however,… I told all of you that I will keep this discussion NON Political as promised on my Blog and that is where I will leave that horrible note, okay?
EXTREMELY SIMPLE but TOTALLY KICK ASS chicken marinade.
And so we get back to my EXTREMELY SIMPLE but TOTALLY KICK ASS chicken marinade that you can concoct while also playing your favorite guitar be it a beloved Fender Stratocaster,… or another…..
This is like one of those diets they tell you that you don’t have to count calories because with this recipe you don’t have to cut or measure ANYTHING!!! And each time it will come out slighthly different but always BEAUTIFUL!! Trust me.
MMMmmmmm got my chicken ready to go.
Here is the “secret” recipe;….
Every batch of marinade will taste slightly different but you will indeed love each batch.
Get your chicken that you want to cook and clean. Once clean get one of those hug gallon Zip Lock type bags and load the chicken. Add the following ingredients and it doesn’t matter how much or how little as you simply cannot make a mistake. Yes!!! Every batch of marinade will taste slightly different but you will indeed love each batch and the only regret will be that you did not write down to millileter what generated the exact mix. It ALWAYS comes out great unless you GREATly over indulge in a particulira ingredient.
Okay so here it is.
Once you have your chicken parts in said Zip Lock bag ( note that you can also do this for a complete chicken, oven stuffer, or Turkey utilizing one of those roasting bags realily available, you add the following ingredients as much or as little as you want.
I find that a few Miller 64’s helps me with the amount of anything that I want to add Emeril Lagasse style “BAM” and get thus get the juices rolling toward a great crop of barbeque roasted chicken.
Okay you have your chicken in the bag.
Add these easily available over the counter ingredients and remember that is does not count how much. Experiment!!!
1) Balsamic vinegar
2) Black Pepper
3) Hot red pepper ( BE careful!!! )
4) A “shot” or two of oil. Your choice. Avoid Castrol GTX as it smokes a bit, and Mobil 1 never boils!
I prefer Canola.
5) Basil
6) Oregano
7) Garlic in ANY form that you can get it. Fresh crushed is the best but 99 Cent “Spice Aisle” Garlic powder also WORKS!!
8) Your favorite barbeque sauce.
Mix the ingredients as your Miller 64 and either cheap Scotch or expensive Single Malt dictates to the voices in your head.
That’s it. If you can find an ingredient called McCormick Grill Mates MONTREAL CHICKEN SEASONING, go for it and add a “dash”. Great stuff, but without it you will still be a “star”, trust me!!
Also trust me that if you at least have ANY of the above ingredients and mix the ingredients as your Miller 64 and either cheap Scotch or expensive Single Malt dictates to the voices in your head you really cannot lose!!!! You can also add a shot of scotch and a bit of beer if you want. Very flexible and so this recipe really beckons you to experiment. I prefer to let this marinade soak in for about 24 hours but even just a few hours is fine.
Any type of grill be it gas, electric, or charcoal will do.
Once you are ready to cook, fire up and pre heat your grill. Any type of grill be it gas, electric, or charcoal will do. I personally use an electric grill but place a few pieces of hardwood charcoal on the burners to get that authentic charcoal barbeque flavor. On full blast with the cover closed I will soon be at 400 degrees which is perfect. Place the chicken breasts bone side down and let them cook for a bit. I usually let them cook for about 10 minutes during which time I am doing some of the prep clean up and cracking open a Miller 64 or in today’s case a Miller Lite. Hey, it’s the holidaze. A wee bit of Scotch is also in order.

Christmas Chicken Grilling to Perfection
You do NOT want to exceed an internal of 180 degrees unless you like to chew on shoe leather.
Okay 10 minutes later I dress the tops of the chicken with some barbeque sauce and then flip them over for another 10 minutes. Occasionally I will check the doneness with a meat thermometer. You do NOT want to exceed an internal of 180 degrees unless you like to chew on shoe leather. When the chicken chops just reach 170, I dress the top side with barbeque sauce, flip the pieces and kill the electric power to the grill. Being that it is abou 29 degrees outside the grill starts to cool quickly however the coals are still quite hot and continue to cook the chicken to the desired doneness. What is nice about this approach is that you minimize the chances of overdoing the chicken and allows you to play your Fender Stratocaster for a few minutes more before going backout to harvest the hot and perfectly cooked chicken.

Christmas Chicken Roasted to Perfection
Don’t you just hate mushy veggies?!
Take you perfectly barbequed chicken and slice the breast like London Broil. Exquisitely delicious. I served it with a mix of steamed broccoli, brussel sprouts, and carrots all done al dente. Don’t you just hate mushy veggies?!

Christmas Chicken Sliced London Broil Style into beautiful Medallions.

Barbequed Chicken with Sides. Miller Lite is not only for breakfast or side dishes, you know… haha!
So that’s it. Oh yeah, you can take any left over chicken, slice it up and put it over a salad the following night.
Good luck and
MERRY CHRISTMAS!!!!!!
As 3D printing is a relatively new phenomena there is a lot of excitement going on about all the possibilities this process opens up. So the question to ask is 3D print a guitar? Answer; Absolutely!!! 3D Printing also known as Additive Manufacturing is a process where successive layers are laid down or “printed” in different shapes until a pre-programed object emerges seemingly out of nowhere. The applications of this process seem to be never ending. From machine parts to revolvers, to body parts, loud speakers and beyond. Now a new generation of printed guitars are coming about and they are truly very cool and inspiring. Of course at this stage, it is mostly the bodies that are 3D printed while a lot of conventional manufacturing still goes into the rest of the process.

Successive Layers are laid down or “Printed”
The guitar bodies are 3D printed. Conventional materials are also used.
As Olaf Diegel states in an article by Todd Halterman October 20, 2013 “On A High Note – Olaf Diegal’s 3D Printed Guitars: http://www.3dprinterworld.com/article/high-note-olaf-diegels-3d-printed-guitars ;
“Look at my guitars. The bodies are 3D printed, but the necks and inner cores are CNC machined. The bridge and tuning heads are cast. My inlay is done with laser engraving and cutting. Some of the plastic bits are injection molded. They use almost every manufacturing technology under the sun.”
The electronics and hardware on these creations are still pretty much standard fare but that takes nothing away from the collective endpoint that results in a truly functional work of art where the imagination is the limit and the coolness factor unlimited.
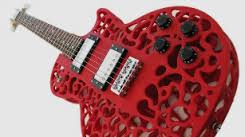
The Les Paul bodies are 3D printed, but the necks and inner cores are CNC machined
A very cool 3D printed acoustic guitar.
In fact there is a very cool 3D printed acoustic guitar as well!! http://www.businessweek.com/articles/2012-10-11/the-worlds-first-3d-printed-guitar.
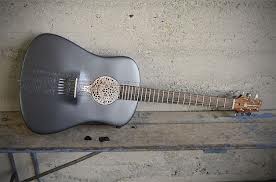
Very cool 3D printed acoustic guitar
3D Printing. The Future is Today!!
As it turns out this process of 3D printing is poised to be a real game changer not only in general but for guitar manufacturing as well. This is just the beginning. Possibly very soon, the entire guitar; body, neck, pickups and wiring might be created simply by programming your computer to do so. Want a Les Paul, Stratocaster or Telecaster? Grab a Miller 64 and hit the “print” button!!!
Behold! The future is today!!
For further reading:
http://cubify.com/products/guitars/
http://www.odd.org.nz/atom.html
http://www.guitarworld.com/another-dimension-odd-3-d-printed-guitars
http://www.businessweek.com/articles/2012-10-11/the-worlds-first-3d-printed-guitar