Ibanez RS1500. Fender Strat Killer?! You decide!!
So what are you thinking …………?
Never gonna happen!
Quite possibly?
Could have been?
Dr. Chuck has lost his friggin’ mind to Miller 64?!!
Well it is time boys and girls to grab a cold one and once again dig into another RANT……
For all those that are not acquainted with the Ibanez RS1500 and all those who swear by the Fender Stratocaster, prepare to have your mind set altered or at least enlarged. I am not looking to simply make converts to this guitar by endorsement or make you swear off your beloved time proven Fender Stratocasters. Also Ibanez does not know me from dirt as does the Hoshino Corporation that was their founding fathers. I have nothing to gain with the following story about one of the most amazing guitars I have ever played and so now the playing field is leveled.
Years ago either before I entered dental school, or during my initial tenure, during summer vacation I took a day trip to Manhattan ( New York City ) for those that are unitiated . Yes, I know there are other cities labeled as Manhattans, but only one is New York City, okay?!) I arrived at 48th St., the guitar Mecca of New York and possibly the world. Me and my friends went GAGA over the guitar and gear offerings!! years before before the most beautiful and talented Lady Gaga coined the term, gulped our breath and drooled over the amazing guitars and gear available at the time to us for only if we had oodles of money.
Real wood topped guitars with minimal pickguard are a thing of beauty!
I always loved real wood topped guitars with minimal pickguard as was becoming more popular by Gibson Les Paul aficionados to leave their pickguards at home instead of mounting them, I loved that Les Paul without a pick guard fanfare a la Dicky Betts, yet always loved Fender Stratocasters and Fender Telecasters as well and wondered what they might look like without a slab of plastic on the top and whether it might even be an improvement. Would they still capture the Fender Stratocaster and Fender Telecaster
“vive” sans pickguard?
At that time, I was dreaming about a Stratocaster with a truncated pickguard to allow the wood grain to show through or NO pickguard at all, perish the thought? I thought that concept would be so cool!I was imagining a Fender Stratocaster with uber wood showing through and no pickguard. Didn’t exist at the time. Oh well………….
Manny’s, Rudy’s and Sam Ash in New York City. A gear Mecca!!
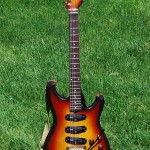
Take a trip to NYC simply to lust over the many things in Manny’s, Rudy’s and Sam Ash that I could not afford and I happened along an Ibanez RS1500 in what I call vintage sunburst,.. howver, I did not know that at the time because the first thing that grabbed my noodle was the body that at first grasp absolutely looked Fender Stratocaster, yeah? Strat style body, 3 Strat style single coil pick up set up most correctly meaning the neck and middle pickup wer parallel to each other but the treble pick up had that cool slant downward towards the bridge which was designed to get every fractrion of an ounce of treble bite out of the strings way back when when George and Leo designed this puppy? Then as I fantacized there was NO pickguard!!!!! Just these really cool frames to bolt and hold the pickguards in place at the proper positions while allowing the beautiful ash wood in between to show case unblocked by a big pickguard. To me at that time this was a HUGE design step forward by Fender. Then I looked at the headstock and realized it was not a Fender Stratocaster at all , but instead a very beautiful state of the art Ibanez RS 1500.
“Crafted in Japan” just oozes a quality vibe that makes one warm and fuzzy!
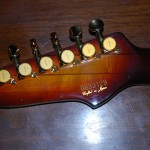
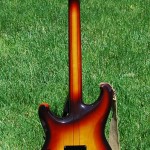
The Ibanez Roadstar RS1500 is made with a nice resonant Ash body with a maple neck through with a rosewood finger board with a 25.5 scale. The neck through aspect is very similar in appearance and feel to the Carvin DC400. See my post: Carvin Guitars: Why you will soon want one!! This means a very comfortable feel and effortless upper fret access. So here I was ogling this beautiful instrument, wanting it very badly, and simply knowing that one day I would own one. And speaking of the headstock, THIS was the Ibanez headstock that I fell in love with. Fenderish enough to look the part, but not at all a law suit plagiarized copy by a long shot. In fact, to me the Ibanez Roadstar headstocks are the most beautiful of any that Ibanez ever offered. The current fondue fork inspired Ibanez headstock does absolutely NOTHING for me, as do the fluorescent construction paper inlays and a cut out hand grip. Hey! To each theie own; they are simply not my style. I’m a more traditional guy. Gotta love the headstock label where it proudly proclaims in an understated way, “Crafted in Japan”. Not simply “made in Japan, but crafted in Japan. That just oozes vibe and gives one that fuzzy feeling of being the proud owner of such a fine instrument as an Ibanez RS1500.
Was I disappointed it was not Fender who presented this most beautiful guitar. Not at all, and also just a tiny bit surprised. When I worked briefly at Sam Ash in the mid 1970’s before being fired by da bastid Mel Fieldz which will be a subject of a future rant, Ibanez was in the depth of producing their law suit guitars and were constructing instruments of surpring quality with more care than Gibson. At that time in the midst of their dreadful “Norlin years” when Gibson was taken over by unmusical bean counters, these interloper rogues almost put the, (can you believe it??!) premier producer of electric guitars; Gibson, out of business!! Coincidentally, Fender had just been taken over by CBS and was also facing their quality doldrums as well. This topic of the Gibson/Fender “dark years” will be the topic of another rant so keep tuning in boys and girls!!
After I realized that this was not a Fender guitar and accepted that it was yet another undeniably excellent offering by the relatively new Ibanez company, I lusted over it for the next umpteen years until I finally after searching the internet and Ebay a few short years ago came across one. Not perfect, but close. You guys know how I feel about “pristine”,… but as I said,this one was close, and so as rare as they were, I went for it with a vengeance. I simpy WANTED this guitar and nothing was going to stop me,…errr,.. that is , as long as I didn’t run out of money,…
This was before the recession hit and ruined everything for sellers. Anyway, they were going for around $1200.00 before Obama was elected. I sniped for $899.00 and was feeling really proud myself as I won the auction, maybe because the listing ended at 3 A:M
(who stays up that late on a weeknight except Mr. Snipe Program, anyway?) or maybe because it had some minor body damage. Who knows? In any case, for that period in time I scored well and I will at this point ride the present economy out rather than sell at a loss as this guitar is amazing and you will soon find out why!
So what sets this guitar apart from the rest of the Fender Stratocaster inspired instruments, so much so that I call it; “Ibanez RS1500/Fender Strat Killer?!! To me above and beyond the excellent quality, the neck through design and the lack of a pickguard that allows the beauty of the ash wood to show through, the most important feature was the very unique wiring harness that allowed infinite tonal tweaking on the Fender Stratocaster kind of theme. And so following I will explain this unique set up which by the way does NOT rely on any active circuitry but is instead totally passive.
First as a base line, let us basically explain the Fender set up. http://www.fender.com/news/the-stratocaster-pickup-selector-switch/Fender has a master volume control, two tone controls, and a 5 position slide pickup selector switch. Position 1 is the treble pick up only, position 2 is the treble and middle pick up, position 3 is the middle pick up, position 4 is the middle and neck pick up, and finally position 5 is the neck pickup only. The middle pick up is reverse wired and so when you are in positions 2 and 4 you are fully out of phase. Position 2 is the bridge pickup/middle pickup combination, and Position 4 is the middle pickup/neck pickup combination. These 2 and 4 or “in between” settings give that classic Fender spank or “quack” as some put it. Very cool tones or very bad tones depending on your point of view. They are sometimes referred to as “Knopfleresque” tones because Dire Straits Mark Knofler has his signature tone based on these settings. I love the sound personally, however I really wished the settings were adjustable from slight quack to full quack. I think that would make for some interesting variable flavors within the realm of Knopfleresquedom, yes? That Fender Strat five position switch is pretty much all or none though.
As a side note, as originally designed, the Fender slide switch only had three positions, bridge, middle, neck. Apparently it was accidentally discovered that if you carefully balance the springiness of the switch to setting in between which later became designated as 2 and 4, you could get these really unique tones that Fender really never had in mind in the first place. Players would then open up the guitars and hot rod the switch by filing a notch in those 2 and 4 areas to grab the switch and hold it in place. Eventually Fender caught on and by popular demand started to make the 5 position switch standard. This sort of serendipity reminds me of how on the Hammond B3, the manufacturer initially considered the classic “key click” as an annoying unwanted defect, now so beloved by Hammond players that Hammond organ emulators strive to duplicate this “defect” in the quest of authentic Hammond B3 tone,….
And so I digress. So let’s get back to topic okay? Manoman, give this guy a couple of Miler 64’s and he jumps ship all over the place!!! Sheesh!!!
Fender Strat flavor that would make Mark Knopfler smile!
For further study:
http://fattoneguitars.wordpress.com/2010/10/27/how-mark-knopfler-got-his-groove/
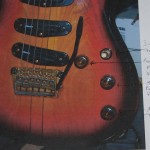
Alrighty then! First glance of the knob layout of the Ibanez RS 1500 doesn’t grab you like it is something out of the ordinary. Not at all. Without the 5 position selector switch of a Fender Stratocaster, it actually looks limited compared to what you would expect to dig up totally on a Fender Strat. The set up actually resembles something that you might find on a Gibson Les Paul even more than a Fender Strat. For starters there is a volume control for both neck and bridge. Turns them BOTH up or down simultaneously. There is also another volume control that is strictly for the middle pick up and also a master tone control. Finally, there is a toggle switch that pretty much acts like it would on a Gibson Les Paul. Okay, for starters, let us turn the middle pick up all the way down and the volume for the neck/bridge pickups all the way up. Flick the toggle towards the bridge pick up and you have,.. the bridge pick up. Flick the toggle to the neck pick up only, and well,.. you have the neck pick up only. Flick it to the middle and you have both neck and bridge pickups. So far no great surprise, very Gibson Les Paul like, and straight forward.
With the above pickup designations explained, here is where the magic starts. Remember I said the middle pick up has its own volume. This is key as the middle pickup is reverse wired like on the Fender Strat. Now let us turn the neck/bridge pickup volume down and turn the middle pick up volume while placing the toggle in the middle. Guess what? You get the middle pickup but it is silent!!! So where am I going with all this stuff? Well remember I said the middle pickup is reverse wired. Let us go back to the original setting where the neck/bridge pickups are engaged, for instance with their volume control dimed. Now you incrementally bring up the middle pick up. As you do, a really cool thing happens. You start to dial in some out of phase Fender Strat “quack” so characteristic of the Fender Stratocaster. Now this is not a Fender Strat like on or off scenario but rather gradations as you turn that middle volume knob anywhere from full off to full on. Boys and girls, there is a whole lot of out of tone flavors going on in between the extremes from slight quack to max quack. VERY, very cool indeed.
Let’s take this further. Again, turn the middle pick up off and flick the toggle to the treble position. Full straight forward treble pickup. Now start to bleed in that middle pick up and you start to again bring on the out of phase quack from subtle to full bore or anything in between. Now repeat this scenario starting with the neck pick up only and start to bleeding the middle from just a touch of quack to again full bore. I think that now you are getting the picture. These settings not only mimic the static one flavor only out of phase positions 2 and 4 on your beloved Fender Stratocaster, they actually expand upon 2 and 4 with infinite variability of intensity of the, if you will; “effect”. This wiring scenario of the Ibanex RS 1500 is HUGE! You can spend hours with this passive circuit tweaking and twisting to arrive at “your” sound!! I just love it. You can also try diming the middle pick up and then bringing the neck/bridge combo incrementally up resulting in ever more killer tones! And so the middle pick up on the Ibanez RS1500 with volume turned off is in stealth mode just wating to attack a Gibson Les Paul like tone stack in any pick up combination with Fender Strat “quack’!!
The best of both worlds! The only thing that might make this better is to have coil tapping humbuckers at all positions or at lest neck and bridge. As it is one could spend eons experimenting with tone, imagine adding in a sense three more accessible pickups?!!! Well, as it hasn’t been done yet at least to my knowledge, it is time once again to put down the Miller 64 http://www.miller64.com/
and get back to the business at hand.
So now you see that the Fender Stratocaster wiring is kind of “black & white”, in comparison to the “NBC peacock” of living color by comparison to the Ibanez RS1500.
The seldom seen Ibanez RS1500 is my favorite of the Ibanez Roadster series. Extremely well built, gorgeous, and tonally versatile to the extreme in a Fender Strat flavor that would make Mark Knopfler smile! For more images and information on the Ibanez RS1500 and others of the most beautiful Ibanez Roadstar line click on the following links:
http://www.ibanezcollectors.com/discus/messages/14/4052.html
Now you know why I pose the eternal question; Ibanez RS1500. Fender Strat Killer? You decide!!
Not likely!!
Gibson Limited Edition Midtown Custom. A classic in the making!
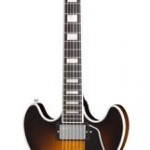
Behold a very, VERY cool new limited edition Gibson semi hollow body guitar inspired by the Gibson ES series of guitars namely the Gibson ES355 which is the top of the line. This guitar looks top shelf and I am confident it plays and sounds that way as well. Needless to say I am quite stoked about Gibson’s new offering and can’t wait to try one out!
Gibson Limited Edition Midtown Custom. The basics of how it is made.
This Gibson limited edition guitar is a bit cheaper to manufacture than a Gibson ES335 or the aforementioned Gibson ES355 it emulates because only the maple cap is arched maple. The rest of the body is a solid block of wood, most likely mahogany, which is chambered out by a programmed CNC ( Computer Numerical Control ) machine to resemble a weight relieved or “semi hollow” body. (…Or “semi solid” depending on your point of view i.e. is the cup half empty or half full? I prefer the term half empty, especially with a Miller 64. It then makes looking forward to the next one a bit less gluttonous than if you are reaching for another while you still have one that is half full,.. but then I digress). Anyway, after that block of mahogany has been transformed by that CNC miracle of technology machine into an appropriately shaped and partly <not going there again!> hollowed guitar body, the arched maple top is basically glued to the top of the body. Of course, I simplified the process a bit, but that is essentially it. Also of note is that the body size of this Gibson Limited Edition Midtown Custom guitar is slightly smaller than a standard Gibson ES355 but still gives the appearance of a full size Gibson ES style guitar. Pretty cool!
On a Gibson ES335/345/355 both the top and back are pieces of arched maple. A center block of wood is shaped and placed, then a side strip of maple us curved to match the outline of the top and back. All the pieces are glued together and appropriate binding placed, etc. This is all done by hand. Much less labor intensive to take what is essentially a “solid body” have it appropriately hollowed out by a machine and then glue a maple top on it. Yes it might not have binding on the sick/back angle of the body and the back of the guitar may be flat un-figured mahogany like a Les Paul, but in any case and bottom line, it works and the result is a top notch Gibson limited edition guitar at a much cheaper price. I’d love to have on one of these babies! I’m also starting to grow fond of the baked maple fingerboards. Smooth and dense. Reading a lot of good things about baked maple and other alternative materials to what is rapidly becoming the unfortunate dwindling supply of ebony.*
Gibson Limited Edition Midtown Custom. How to painlessly ( well almost ) get one now!
Also companies like American Musical Supply which offer interest free payment plans take a bit of the sting out of the purchase. This is a whole lot of guitar for cost of admission of $1499.00 including a hard shell case! In summary, the Gibson Limited Edition Midtown Custom is a great guitar at a great price!
http://www.americanmusical.com/Item–i-GIB-DSDCCT-LIST
Great job Gibson! Check it out!
http://www2.gibson.com/Products/Electric-Guitars/Designer/Gibson-USA/Midtown-Custom.aspx
*For further study on the current state of wood supplies in general and especially ebony check out this very informative video by Bob Taylor of Taylor Guitars. An eye opener for sure!
For some other view points of the Gibson Limited Edition Midtown Custom check out:
http://www.mylespaul.com/forums/other-gibsons/222312-ngd-gibson-midtown-custom-2.html
3 easy mods to make your Epiphone EB3 Bass Great! Part 3: Jeannie Pickguards!
If you missed
Part 1: 3 easy mods to make your Epiphone EB3 Bass GREAT!!!!! Part 1: Epiphone Bass Parts. Varitone
Part 2: 3 easy mods to make your Epiphone EB Bass GREAT!!!!! Part 2: Epiphone Bass Parts. Bridge work,
and would like to read the posts in sequence, or would like to review, this is a good time to dig into the whole story!
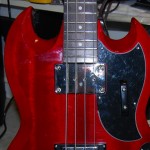
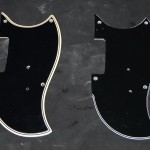
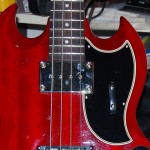
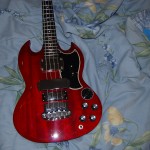
The last modification to the Epiphone Custom Shop EB3 is more in the area of aesthetics as opposed to pure function but remember what I said about how a clean guitar sounds better and a car runs better? Well then, don’t question it, will ya?! Just take my word for it unless of course, you already know this tautology! It is just the way it is. Looking at the bass I really was not happy with the pick guard. I mean Epiphone pickguards are mostly okay and sometimes awesome as delivered stock but in this case it was somewhat lackluster to say the least. Similar to your small sized Gibson SG pickguard but a bit less exciting. this stock Epiphone bass guitar pickguard was 4 layer black/white/black/white and had a thin edge bevel. Part of the guard was not beveled at all. What’s up with THAT!, Dr. Epiphone??!! You guys have no bevel machine?! Such a nice looking bass and such a lack luster pickguard? I mean after all this revamping of the bass, it really needs a vintage style pickguard to play its best, yeah?
So once again an Internet search is in order. I come across a site named Jeannie Pickguards. http://home.comcast.net/~pickguards/ Pretty cool site. They do some nice custom work. I also noticed afterwards that they had a running listing on Ebay for a vintage style Gibson/Epiphone EB3 pickguards amongst other offerings. The pickguard in the listing had 5 layers black/white/black/white/black and the layers were a bit thicker; sweet! The thicker pickguard lends itself to a nice wide vintage style bevel which has that old Gibson EB3 vibe to it. Just what I was looking for! I went for it. There is a process involved for getting it built though and at this point I became well acquainted with Roger who is the irascible gent that actually custom builds the pickguards at Jeannie Pickguards. I was instructed to take off the original stock pickguard and send it to Roger so he can use it as a template. This was a must because without it there was no guarantee the pickguard would fit. He also wanted to know the year of the bass. I told him that it was an Epiphone Custom Shop EB3 Bass made for the Japanese market only and was produced in 2011. Okay, fine. I sent Roger the pickguard and the funds for the new one ( forty five dollars ) through Paypal and waited for both pickguards to arrive back.
In the meantime Roger calls me and leaves a message to call him back and so I did. He wanted to know if I would like cream instead of white sandwiched in with the black. Very nice of Roger to consider calling me on that one being that the white vs. cream concept was not even in my life space up to that point, just figured it was going to be a new pickguard and white is the arbitrary color choice to counter balance black, period. Roger is starting to grow on me now. Maybe I was a bit premature labeling him irascible and actually telling him he should be nicer? I remember when we had that discussion on the phone he said to me; “I really AM a nice guy!! Problem is you can easily misjudge a person and his tone/intentions by what he states on the internet”. Really can’t dispute that. Can’t tell you how many times I pissed people off and started arguments because I was either misunderstood or taken way too seriously when I was only playfully busting balls in my emails!
Anyway, without hesitation I went with Roger’s suggestion as the cream color off sets the black very nicely and gives the pickguard the appearance of years of fading and yellowing which is perfect for the vintage look. A week passes but it feels like a month because I am like a kid on Christmas day simply busting for a look before it is time to open the presents. The pickguards finally arrive! I archive the stock pickguard with the stock bridge and the stock wiring harness. The pickguard looks perfect, installs perfectly, and completes the look. Simply love it.
Should I stop here or put on the chrome bar cover that the original Gibson EB3 had?
I really have mixed feelings about it. Sure that is the way it was, but I am not sure that an unnecessary piece of chrome bling adds anything to the overall appearance or in fact takes something away. So at this point of indecision, I am not installing it. I really want to make sure I want it there because once the required two mounting holes are drilled there is no way to un-drill them. This is fine for now.
Okay then. All in all, I did throw a few dollars into this bass, actually a bit more than my original investment which some might call me nuts, nuts, nuts!!!, for doing so. First up was the hard shell case www.americanmusical.com/, then the Rothstein varitone circuit http://www.guitar-mod.com/ followed by the Hipshot Supertune bass bridge http://store.hipshotproducts.com/cart.php?m=product_detail&p=264 and finally the Jeannie pickguard. Throw in an extra twenty dollars for the chrome bridge cover in case I decide to mount it. By the way, speaking of the chrome bridge cover, this one is an aftermarket replica. The original vintage chrome bridge covers as scavenged off the old Gibson EB3 basses by the vultures who dismantle perfectly good instruments to sell them part by part are fetching insane money and are tarnished and pitted. As you know I like my instruments new, pristine, and clean as a whistle. Why? Of course because they play better that way! This Epiphone Custom Shop EB3 bass is now everything I want in an EB3 bass without the stellar price tag of a vintage original Gibson. I had a lot of fun with this project and ended up with a great bass. A player for sure, but smokin’ HOT! Hope you enjoyed the adventure as much as I did and thanks for visiting drchucksgearrants!
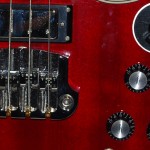
In my continued search through a plethora of guitar parts on the market I will need to address the next issue on this new Epiphone Custom Shop EB3 bass, (or as I search for bass bridge parts I might refer to this as the Epiphone SG bass) and that is intonation. So now we are getting in to the set up phase of making this bass rock! First, I lowered the bridge to the point where they cleared the upper frets without choking and fretting out and also still rang clearly. Now in the lower fret area I saw that there was more “relief” or upper curvature that I like and felt there was room there to get the strings a bit closer to the fingerboard. Off comes the truss rod cover, insert the truss rod wrench and very slightly turn clockwise checking between increments. As the truss rod is adjusted in this fashion, the relief is lessened, the neck becomes flatter and the strings get closer to the fingerboard resulting in lower more comfortable action. What I want is to get the playing action as close and effortless as possible while also allowing the strings to ring out clearly. When the strings are high they ring out clearly. When they are too low they become stifled and somewhat dead in sound, and also quite often buzz. My goal is to reach that particular “sweet spot” in between these polar opposites that gives me the best of both worlds; comfortable playing action and great tone.
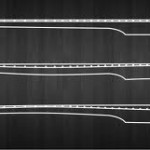
Trying to get to get the bass strings as close as possible while still allowing them to ring out requires minimizing relief but avoiding back bow on the Epiphoine EB3 or Epiphone SG bass.
After a few tweaks of the truss rod of about an eighth of an inch each time, I get there. Doing a test run, it plays really good, but after tightening the truss rod, I have a little buzzing on frets 19 and 21. Feeling that they may need to be filed and dressed, I resist the urge and let the bass sit for two days after the neck adjustments. This is a good idea because we are dealing with wood. By tightening the truss rod, I increased the tension and stress on the neck. Quite often after getting things really nice, you can come back a day or two after to find out that the neck responded more than you might have anticipated leaving you with less than ideal relief, in which case you have to go back in and readjust in the other direction to lessen the tension and bring the neck back to where you wanted it.
Sometimes you have to repeat the process, sometimes not. Like I said it is wood and that leaves a percentage of uncertainty with respect to truss rod adjustments.
As it turned out, there was no change at all after a couple of days. Out came the fret files. This can get tricky as you will see. I stated that frets 19 and 21 were buzzing just a bit. First I cleared fret 19 by slightly taking down fret 20. Good so far, well not exactly because fret 20 was now buzzing against 21 where it wasn’t previously. Now I take down fret 21 and all seems pretty good except for just the slightest buzz of fret 21 against fret 22. A slight filing of 22 corrects this. Then I get my fret dressing and polishing kit out to smooth down the areas where I adjusted and leave a mirror like surface once again. Nice action, clear bell like tones. Cool. Apply a thin coat of lemon oil to the fingerboard, work it in, buff it out.
The lesson to be had from this is that when you eliminate a buzz somewhere on the fingerboard, often afterward, you start to chase that buzz all the up the fingerboard. In this case when fret 19 buzzed against fret 20, I ended up filing all the way up to the last fret to get it right. So you have to be careful, VERY careful not to overdo it, especially if you have a problem much lower down the neck. You have to be very patient and make very slight adjustments when filing a fret, constantly checking and rechecking. You can easily take away height but if you’ve gone too far, you have a potential nightmare on your hands. So if you are ever inclined to do this to a guitar, grab yourself a cold Miller 64, sit back for a few minutes and enjoy, then really consider whether you are up to the job. If you have never done any fret work or set up work you might want to consider acquiring a nice cheap guitar on Ebay and hone your skills a bit before you go out and start messing with one of your keepers, or let an experienced tech do the job for you. I have been doing this for a long time and I still have some dicey moments that I start to cut a sweat over. So far, knock on guitar neck, no disasters.
Next intonation check. Everything is within normal limits and sounds good except for the G string. The 12th fret octave is noticeably sharp of the harmonic. What to do? In order to bring the octave down you have to increase the overall string length between the bridge and the nut. I then adjust the bridge saddle so that it is further away from the nut. I do this until the 12th fret octave rings true with the harmonic. Now there is another problem. As it turns out, the more the saddle is adjusted away from the nut, the closer the string becomes to the neck. With the intonation adjusted properly, the G string is too close to the neck and fretting out. It should be a simple fix, right? Simply raise that saddle until the string height falls inline again with the other strings. Problem is, Epiphone and well as the Gibson EB3 have only a two way adjustable bridge. You can adjust the entire bridge in terms of height and the bridge saddles individually in terms of intonation but you cannot adjust the individual saddles for string height. This really sucks, especially when I am now so close to reaching “set up Nirvana”.
What can be done. I can adjust the bridge as a unit to where the offending G string sits properly which would make the other strings unacceptably high, and then file down the remaining saddles until they all line up with this SOB of a G string! Extremely labor intensive to incrementally file a steel bridge saddle until it matches and then do it two more times while making sure that the intonated spot on the saddle adjustment screw is not altered. I think I’d rather experience Chinese water torture than go through that. So throwing my hands up in the air I came up with a quick effective but very cheesy fix. I took out a fat rubber band from my junk drawer that was used previously to hold a lobsters claw closed. I am sure you know the type. Small diameter, wide, and thick. I cut two vertical slices from the rubber band and place one under the G string saddle to raise it. Not bad, but not enough. Add the second slice and that does it. I have raised the saddle with two chunks of rubber. Not very elegant and I am not really happy about this but is effective for the time being and does the job.
In the meantime I sort through as many guitar blogs and guitar parts blogs and websites for Epiphone Bass Parts as I can find relative to this problem. Honestly, I think this is a design flaw and both the Gibson and Epiphone bridge are pretty much the same. In fact, the original Gibson EB3 bass didn’t even have intonatable bridge saddles but simply a raised berm on the bridge to approximate where everything might be correct. 2 way adjustable is bad enough. That must have stunk even worse considering the the only adjustment possible was to raise or lower the bridge height only as a unit!
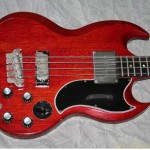
Gibson EB3 Original One Way Adjustable Bridge Not very adjustable at all! One size fits all intonation!
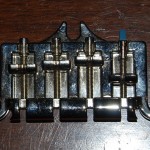
Epiphone stock 2 way adjustable bass bridge. Note lobster claw rubber band segments for G string height adjustment. Yipes!
Oh well, that’s life I suppose… Then I happen to come across what might very well be the solution!!! Noodling around Ebay I see something that is the answer and the second easy mod that will make this bass ROCK! It is called the HIPSHOT Supertune Bass Bridge. For further information click on this link:http://store.hipshotproducts.com/cart.php?m=product_detail&p=264
This is a direct no modification replacement 3 way adjustable bridge for Gibson and Epiphone EB3 basses. Looks like EXACTLY what I want!. Ch-ching! Add another $89.00 to the cost of admission but if this mod, like the Rothstein varitone circuit can make a significant improvement on an overall excellent platform it will be worth the investment and so I do a BIN ( Buy It Now ).
The following week the bridge arrives and the install goes smooth as silk taking me seriously about five minutes for the basic install. I tune up to pitch and do a quick adjustment of individual string heights!! Yay!! INDIVIDUAL adjustment!!! The bridge saddles are similar to what you would find on a typical Fender Sratocaster or Telecaster having twp set screws for height adjustment; one at either end of the saddle. Then I adjust all the 12th fret octaves to ring true to their respective harmonics and do a final height adjustment
on all the strings. Wonderful, this bridge totally works, is a beautiful addition, and is built like a tank. Final tune up, plug into my Ampeg B-15R and this bass plays and sounds spectacular. This new chunk of steel bridge really seems to improve the depth and sustain as well and it does make sense. Instead of the old bridge suspended over the top of the bass by three bolts, this bridge is clamped flat against the top by two bolts. The entire bridge assembly rests right on the bass. This Epiphone EB3 bass plays so well now, I really cannot see how one with a Gibson name on the headstock could outdo it!!
Next up; 3 easy mods to make your Epiphone EB3 Bass GREAT! The Finishing touch!
